- If you do not have Xcode installed on your Mac installed, download it from the Apple developer site. and install it on your computer.
- You must also install the Xcode command line
tools; this can be done from the command line from
Terminal window as follows:
xcode-select --install
- If this completes successfully, you are now ready to use Xcode with BRIDGES.
- Open Xcode and you should see it on your dock(set Options to keep it on the dock permanently).
- Download the Bridges C++ class files from these links ( [MacOS X -- Intel x64], [MacOS X -- Arm 64] ). Save this in a convenient folder. You will need this later.
- BRIDGES uses the CURL library for communicating with the web server, and posting assignments. Download CURL from this link and install the library in a convenient location
- Open Xcode
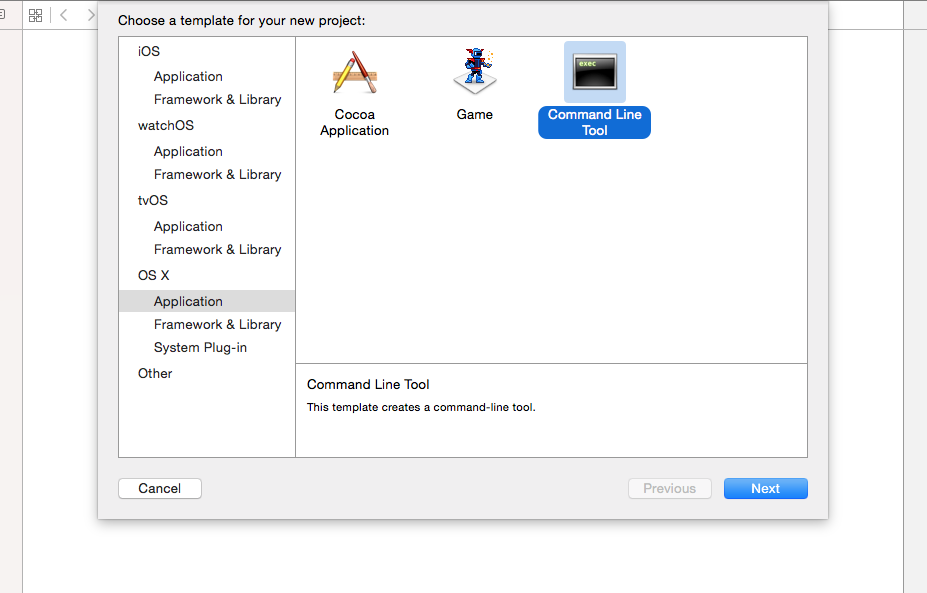
- Click on "Create New Project..."
- On the macOS tab, click on Command Line Tool under Application
- Specify a name for the project and a location on your drive.
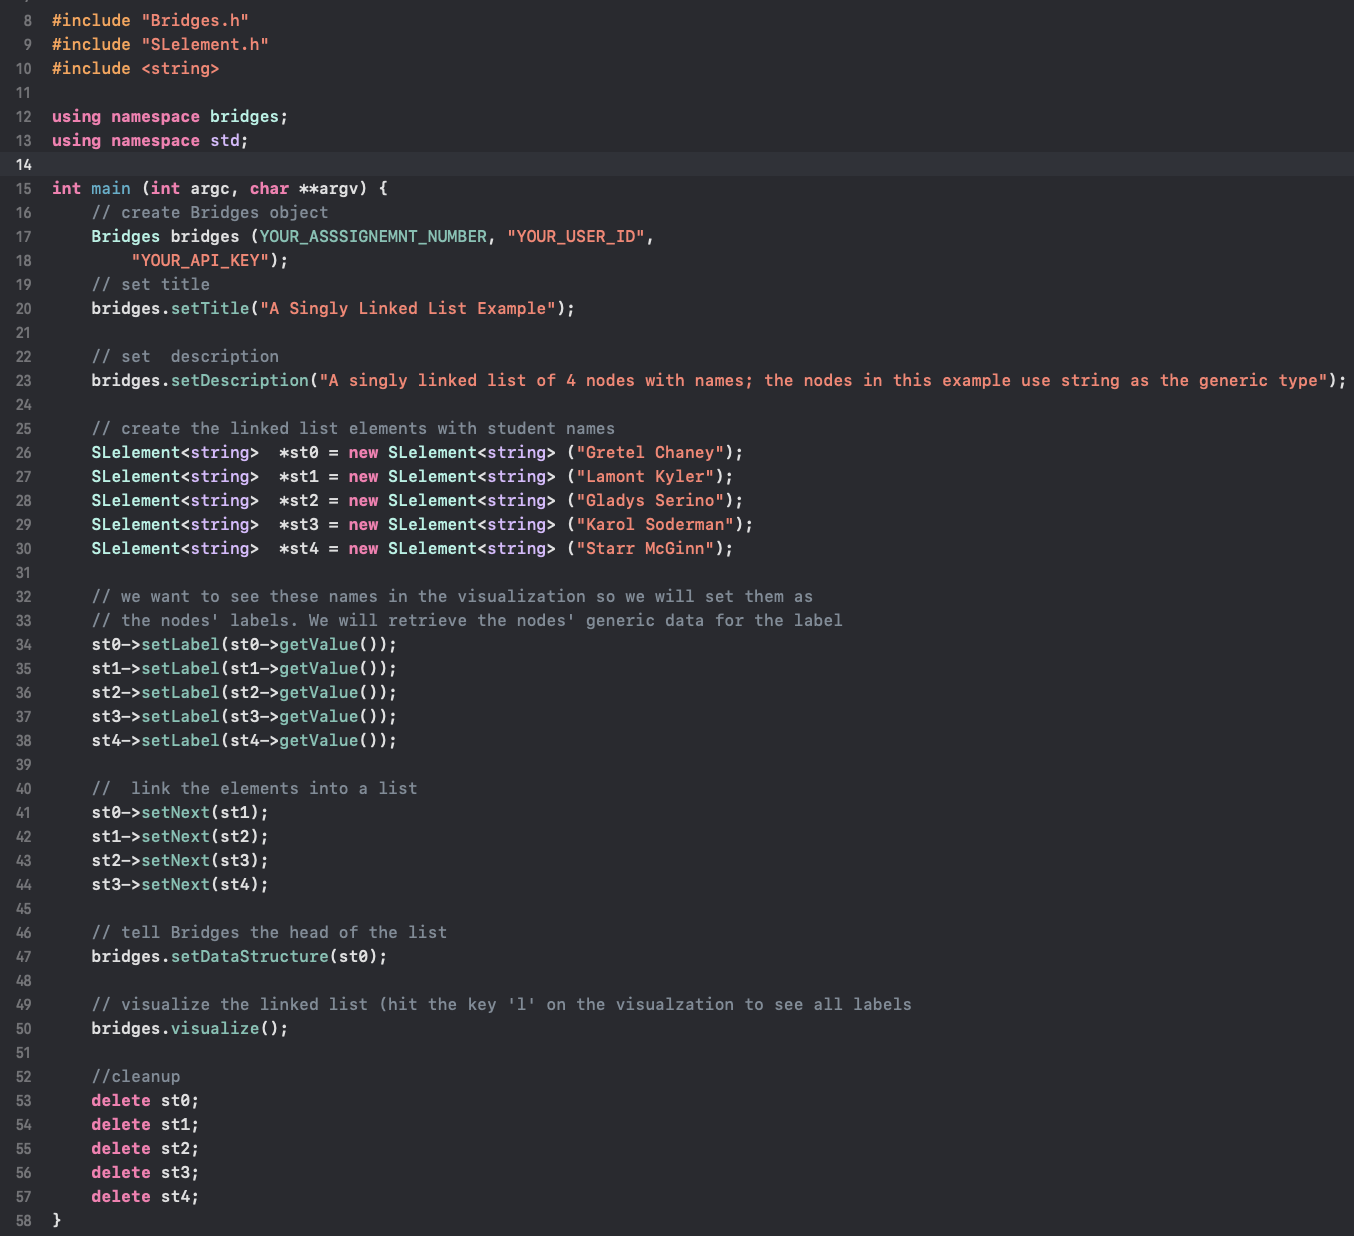
- You should now see a project on the left panel with a predefined main.cpp skeleton. Click on main.cpp to bring up the source file.

- There are multiple ways to import a source file. Here we will simply copy/paste a BRIDGES program to illustrate a singly linked list example. You can copy the example from here.
- Make sure to replace the Bridges constructor parameters with your own user ID and API key associated with your Bridges account.
- Notice the number of errors that show up; we will resolve them next.
- Click on the Project located in the left pannel This will bring up the Project Settings (middle panel). Select Build Settings (top panel)
- You will next need to specify the library and include search paths
- Include Paths: You will need to specify
the path to the CURL library include as well as
the BRIDGES class include files(not all BRIDGES
sources are in include files)
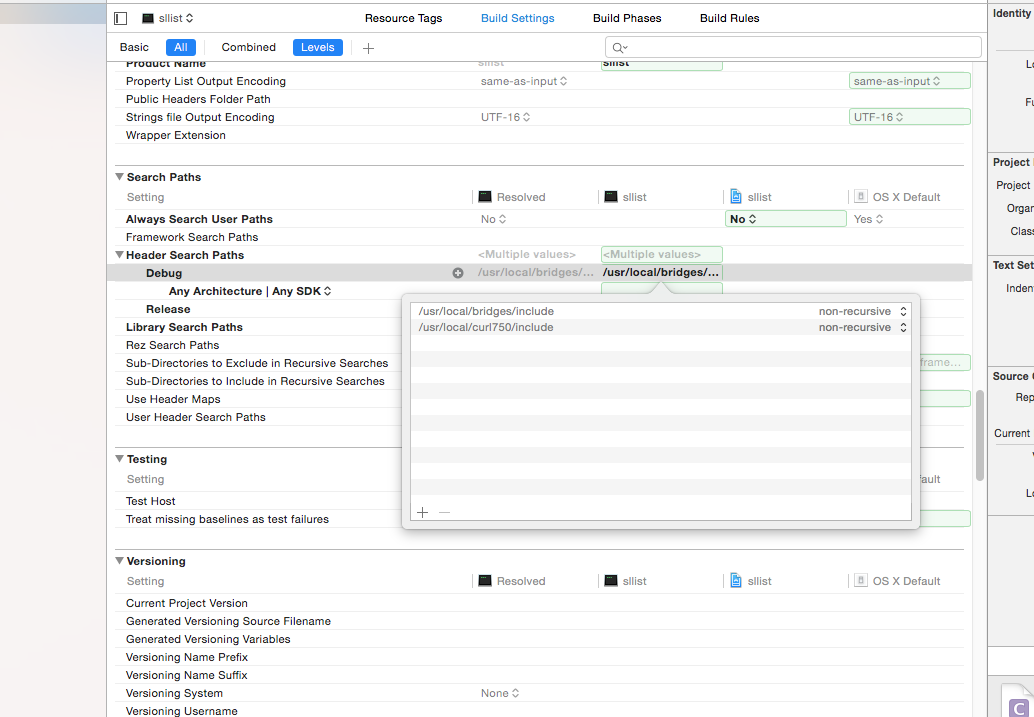
- Select All and Levels near the top of the page.
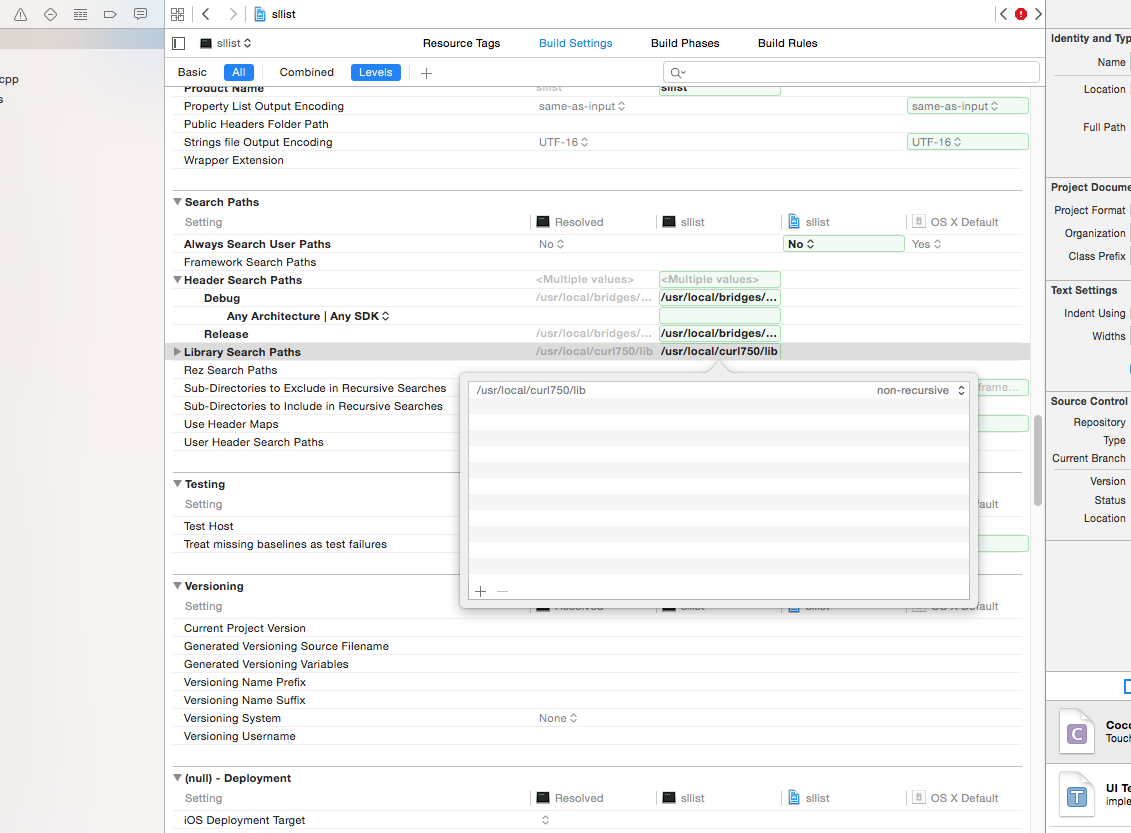
- Scroll down to the section titled Search Paths
- Double click on the middle of line that says "Header Search Paths" and this will bring up an edit box(see figure on the right).
- Click on the "+" character on the bottom to add a path. You will do this twice to add the two include paths, as shown. These paths refer to the locations of the include files of CURL library and the BRIDGES include files, respectively.
- Click anywhere else to get rid of the editor box.
- Look for the "Library Search Paths" right under "Header Search Paths"
- Similar to the previous step, double click to bring up the Editor box and enter Library Search path.
- The search could be something like /Users/your-username/local/curl850/lib)
- Click anywhere else to get rid of the editor box.
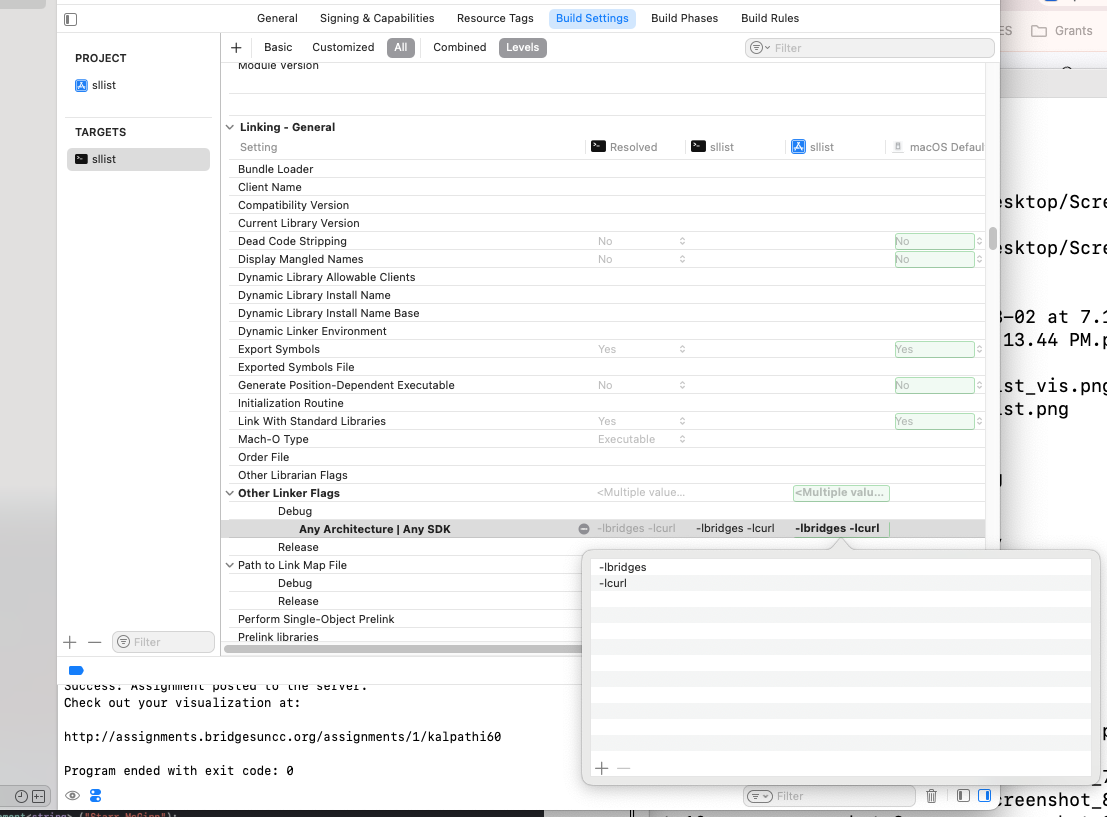
- Link the CURL and Bridges Libraries
- Scroll to "Linking-General" section and look for "Other Linker Flags"
- Click the + button and add the Bridges library with -l bridges". Repeat for the Curl library and type -l curl
- To build and run your project, hit the 'Run' button(rightward pointing filled triangle on the upper left window).
- If everything compiles correctly, you will see a console window at the bottom with a web link pointing to the visualization. Else if the build failed, then click on the little triangle with the exclamation point(below the Build/Run button) to see the build errors.
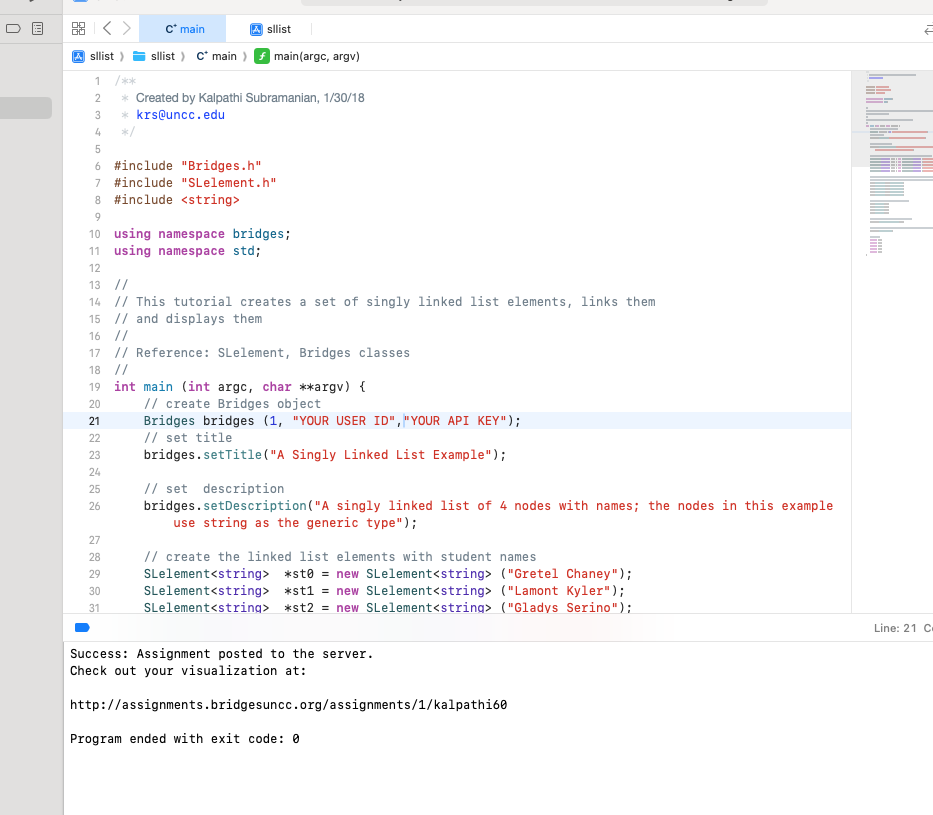
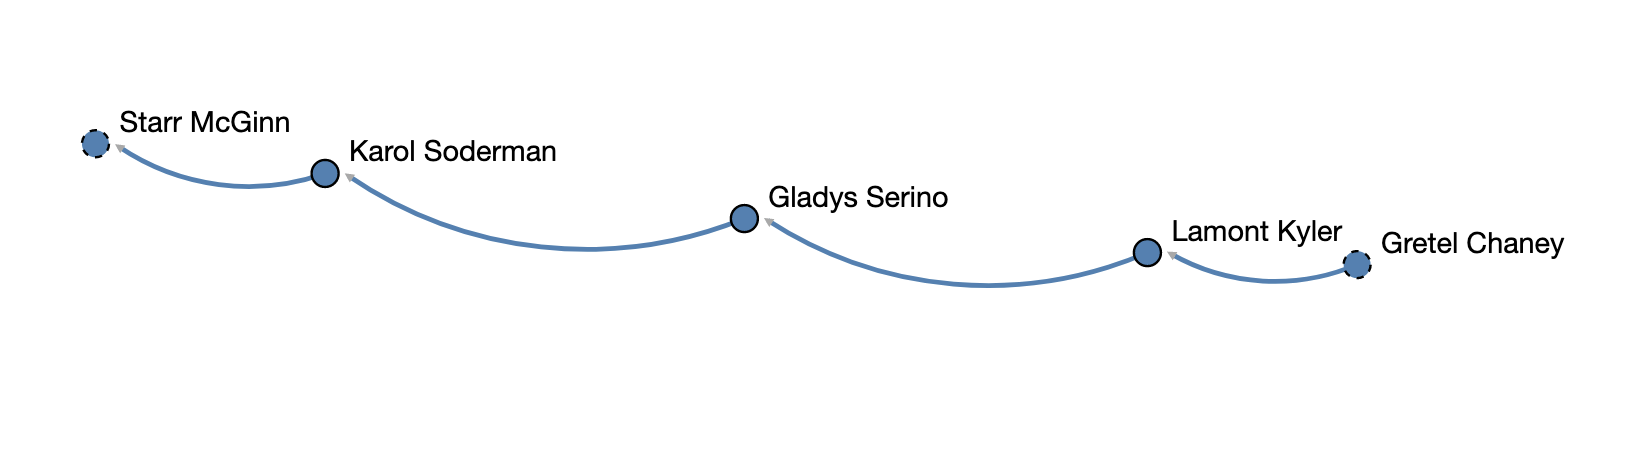
- Paste the link into your browser to see the doubly linked list.
- If you see the visualization, you are done with your first BRIDGES program. Congratulations!
- You should be able to move the visualization with your left button, click and pull the nodes, see the labels on mouse over, etc.